Taking Photos in GT5
This is a basic guide on the camera provided in GT5 and it's basic functions. The photos shown have been altered slightly for this article. The images appear brighter on the computer screen than they look in GT5 and so the brightness and contrast has been adjusted to closer aproximate what appears on the TV screen. The images have also been resized to fit.
The camera feature in GT5 gives you a profesonial 35mm digital camera to shoot both staged stills and race action photos. It can be accessed by going into the Photo Travel section where you can stage your cars at varrious locations, or in replay mode by clicking on the Photo Mode button. The mechanical features of the camera are height, zoom, tilt, shutter speed, f-stop and exposure. There are also several digital effects to give your photo a unique look. I'll take a bit to explain how each of these features work and how to use them to create life-like photos from a video game.
Part I: Basic use and featuresNote: To use the camera, you will need to use your controler and have it set to input #1. The camera features do not work with the wheel. (or at least not with the Driving Force GT wheel)
Photo Travel:To set up high quality, full sized (up to 3840x1260) staged photos you will access the Photo Travel section from the bottom right hand corner of your GT Life main screen. Clicking this icon will open up a list of locations to take your staged photos in. Select any location and when the title screen comes up, press the "x" button and an option box will appear asking where you would like to place your car in the scene. After selecting a placement for your car, you will then be asked where you would like to place your camera. Both of these placements can be later adjusted in the scene.
Photo Mode:To take race action shots you can access the Photo Mode while watching a replay. Simply pause the replay (no option to FF or reverse the playback, this blows), and click the Photo Mode button on the lower right of the screen, this will bring up your camera view. Controls for the camera placement and functions are the same as in Photo Mode, but you cannot move the cars in the scene. There is also no wallpaper sizing for these shots and the shutter speed can't be set below 1/60th sec.
Car and camera placement:When in the photo location, you can further place your car and camera just where and at what angle you would like. You can move yourself around with the joystick controls to find the right angle to shoot your car from. You may also move the car to a different location within the scene.
To move your car, press "select" and a blue box will appear around the car. You can then use the joystick controls to move and turn your car. Pressing the "triangle" button will pop up an option menu to change the angle of the front wheels, turn on the lights, or turn the car 180 deg.
Taking the shot:Once you have the car placed and the right angle to take the picture, press the "x" button. You will hear the click of the camera. (note: you have not taken the photo yet) This will then pull up the view finder of the camera. You can now further fine tune your angle with the joystick controls left and right, up and down. By pressing and holding the "R1" button, you can zoom and tilt the camera. You can also press the "select" button to access your car placement controls.
At the bottom of the screen you will see the settings for the camera. From left to right, high-lighted in green, you will see the zoom amount as f=__mm, the shutter speed as 1/__sec., the F-stop as F_._ and the exposure level as a + or - _._EV. You can make quick changes to these settings here, or press the "triangle" button for more options.
Pressing the "triangle" button will pop up a menu that will let you select your aspect ratio, filter effects, magnification (x1=standard, x2=wallpaper size), file type (JPEG or 3D), composition (horizontal or vertical), and the fine tune adjustments for focal length, F-stop, shutter speed and exposure. The last option is to invert the Y axis for the camera. This means when you push up on the joystick, your view will pan down. (not sure why this option is even here?)
Finally, don't forget to focus your camera by pointing and clicking the "square" button. The camera will focus at the circle in the center of the view finder. This will also set the center point of focus for your field of view (F-stop) and the focal length will use this as it's reference point in the scene. If your car is set to one side of the photo, you'll need to point at it, set the focus, then re-center your scene for the shot.
Once all is set, you press the "x" button to take the photo. The photo will process and appear full screen. You may either save (x) or go back to re-adjust (o). Saved photos can be accessed by clicking on the camera icon on the left side of your GT Life menu. There you can assign favorites or upload your picks on-line to be viewed by your friends. (note: you recieve a trophy for your first on-line upload)
Camera options:Shutter Speed:Shutter speed refers to how long the shutter, or eye, of the camera stays open. The longer the shutter remains open, the more light and color can be gathered by the film. For calm locations with no movement and a staged car, you can take this option all the way to 1/1sec which leaves the shutter open for one full second. For race action photos, this would result in nothing but motion blur. For those photos you will need to speed the shutter up to stop the motion of the cars and/or background. At lower car speeds, you may find that 1/250 to 1/500 sec will be sufficent to capture a clear image. At higher car speeds, you will need to go to 1/1000 to 1/2000 sec to avoid a blury photo. Exterme situations may require even more.
Trick:Use your shutter speed to capture a sense of speed in race action photos. A perfectly motionless race photo will look like the cars are staged around the track. Play with your shutter speeds to have some motion blur on things like the background, opponent's cars and even your own car. Some blur in a shot is desirable to let the viewer know this was a captured moment and not staged. Below is an example of how this can work.
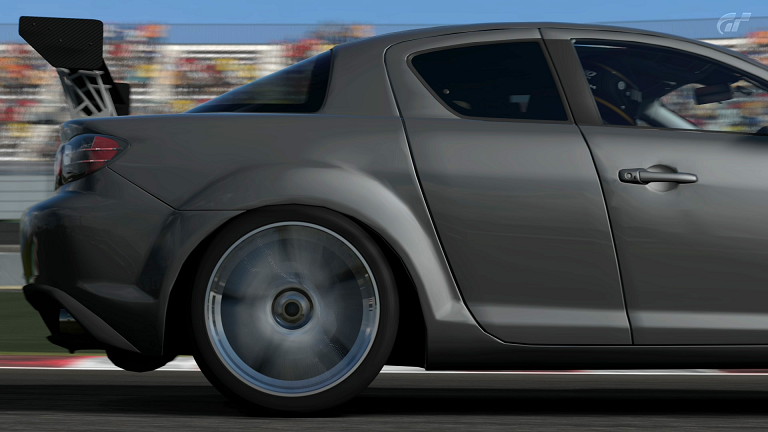
You will note how the car's body is clear and in focus while everything else is moving.
f-stop:The f-stop on a 35mm camera refers to the focal depth of the image. A smaller f-stop will focus on objects close to the point of focus while a larger f-stop brings items further away into focus. The smaller (lower number) f-stop will make an object stand out from the foreground and background. The larger (bigger number) f-stop will bring more of the fore and background into the picture.
Trick:This is the way to either show depth in a photo or to isolate the object from the scene to make it pop out. Typicaly you want to draw attention to a patticular spot in your photo. Play with the f-stop to achieve this. Be sure to refocus the camera (square button) when you change your f-stop. An example:
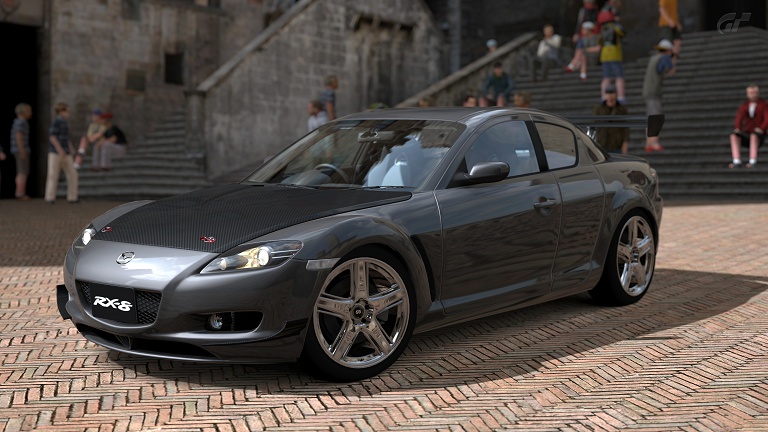
Note how the people and buildings in the back are a bit blury and the car and street is clear.
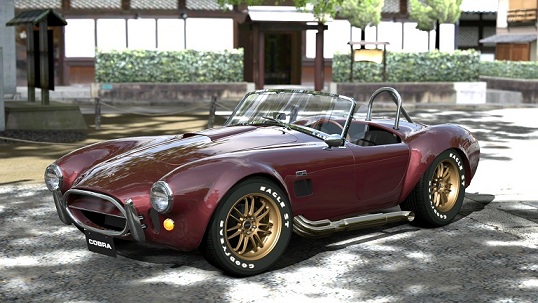
Exposure level:The exposure level will adjust the brightness of the scene. Much of the fine detail of the scene can be lost by over-exposure. I have found that this is especially helpfull in getting the car to melt into the scene. The inital exposure setting for the camera is 0.0EV. This is usually too bright for most daylight photos. This ends up leaving the car to look as though it was sitting on top of the scenery instead of in it. Here is a perfect example of this effect when I was just starting to play with the camera.
There is nothing wrong with the shot, the car is in focus and the scene has been prepared well but it simply does not look very realistic. It looks like a computer generated image.
Here are 3 examples of different exposure settings:

The first image was shot at 0.0EV. The bright parts of the photo are blown out and lose all detail. The body of the car looks fine, but around the wheels and tires it's not "into the secene".
The second image was shot at -1.0EV. The detail in the bright areas has appeared (look at the pavers in the street). The car has also settled into the photo.
The third image was shot at -1.6EV. It may be just a bit dark and some fine adjustment of the exposure would help. Somewhere around a -1.3 would have been the best setting here.
Trick:Try taking and saving three shots with different exposure levels and look at them one after another in the photo album. What may at first appear to be the right setting by itself could change after viewing the three photos in a row.
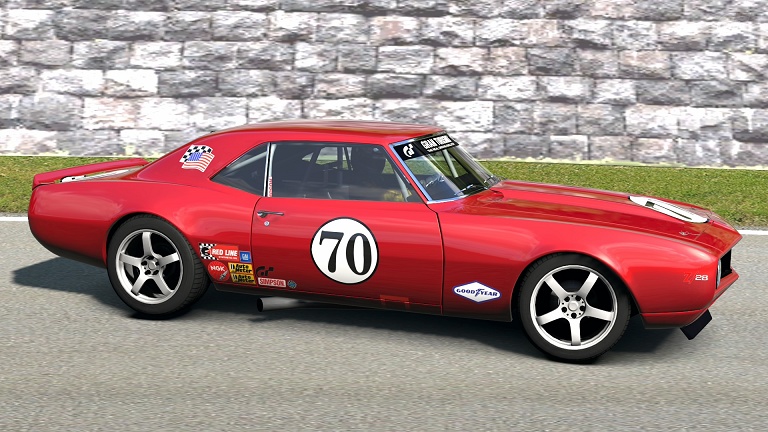
Put all these elements together and you will get some very good, realistic photos. This is probably my best shot to date. Wheel spin, motion, exposure all combined to make a photo hard to tell if it's real or not!

DMH

 by GTSC_weido8 Sun Jul 12 2015, 12:21


